Roll out for Windows
Seclore for Windows can be installed using Central Management tools like SCCM in multiple machines.
The scripts mentioned below can be used while deploying the agent through a Central Management tool.
Follow these steps to roll out the Seclore for Windows agent:
1. Create a new Package
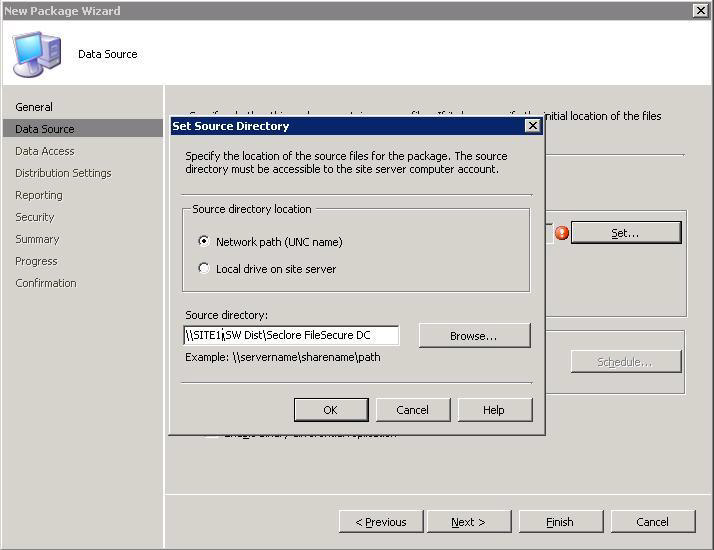
- Store the source FileSecure_Desktop_Client.msi file in a folder which is shared over the network or a local drive on site server.
- In the Configuration Manager 2007 Administration Console, expand Computer Management in the panel on the left side.
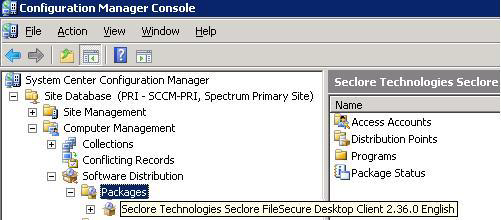
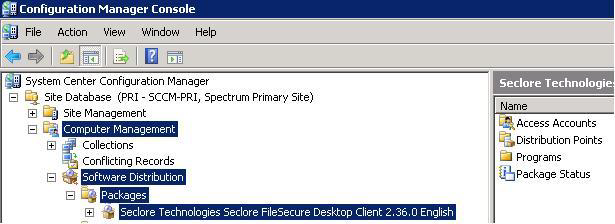
- Under Computer Management, expand Software Distribution. Right click on Packages and select New > Package.

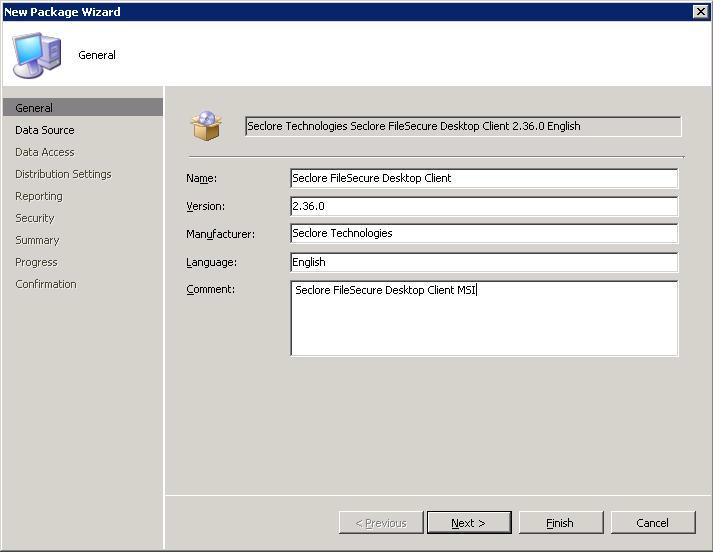
- In the New Package Wizard's General page, fill in the form fields to describe the application as best as you can. The more information you provide, the more it can help with future tasks.
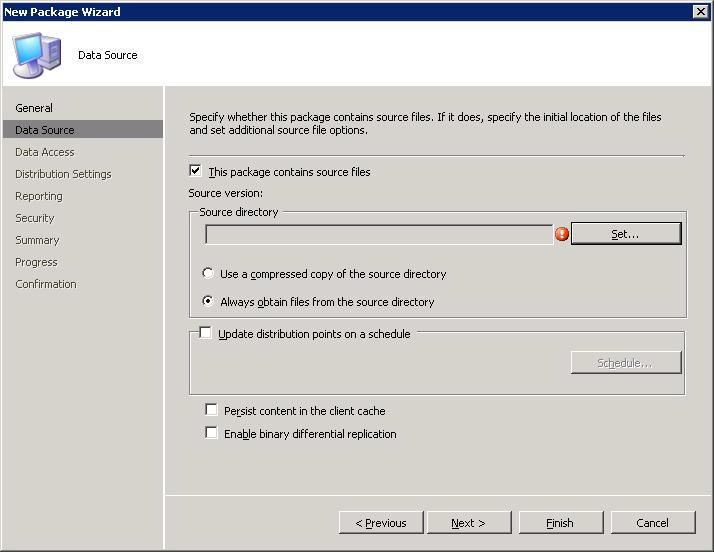
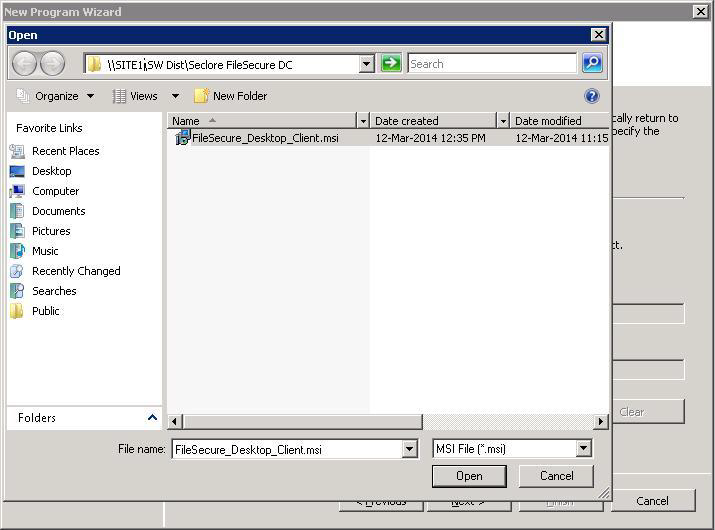
- On the Data Source page, select the Source directory that contains FileSecure_Desktop_Client.msi file.
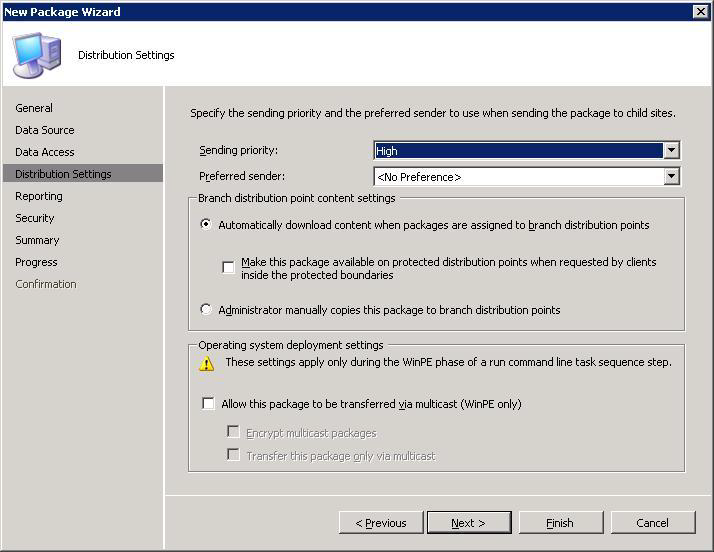
- On the Distribution Settings page, set the Sending priority to High.
- You may leave the rest of the pages with default values and click Finish.
- You would now see a new package created under Packages.
2. Create a new Program
- In the Configuration Manager 2007 Administration Console, expand Computer Management in the panel on the left side.
- Under Computer Management, expand Software Distribution.
- Expand Packages and select Seclore FileSecure Desktop Client (package created in the previous step).
- On the right-hand side panel, right click on Programs. Select New > Program.

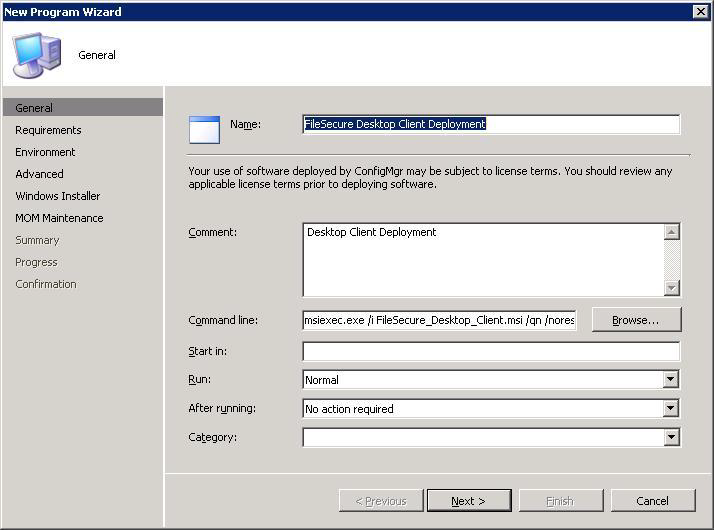
- In the New Program Wizard's General page, fill in the form fields.
Name: FileSecure Desktop Client Deployment
Comment: Desktop Client Deployment
Command Line: Enter the command mentioned below
Command for installation of Seclore for Windows agent:
msiexec.exe /i ""location where the msi is placed"\FileSecure Desktop Client.msi " /qn /norestart
(For example, msiexec.exe /i "C:\username\Desktop\FileSecure Desktop Client.msi" /qn /norestart)
Command for uninstalling Seclore for Windows agent:
msiexec /x {DCD8999F-7A5D-4645-B4FE-56AC77F32F66} /qn
Start in: **blank
Run: Normal
After running: No action required
Category: **blank
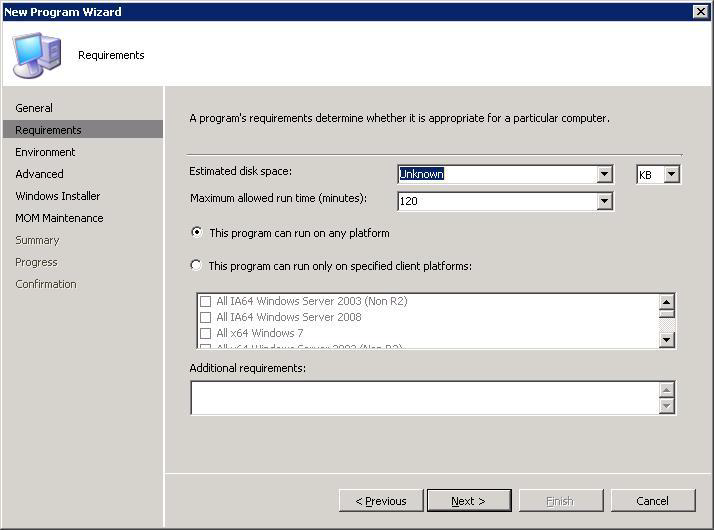
- On the Requirements page, you may define the space needed on the client machine to initiate the installation, maximum allowed run time, and what platforms to run this program on. (You may leave the default values as is)
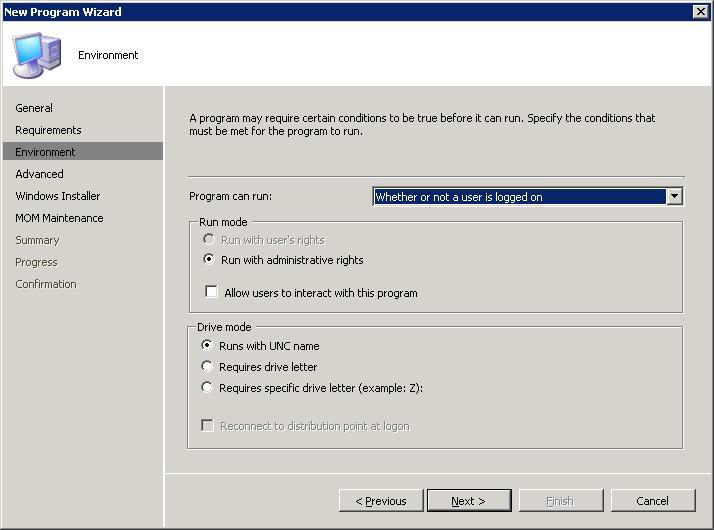
- On the Environment page, select 'Whether or not a user is logged on' under Program can run. (This would make the program run with administrative rights)
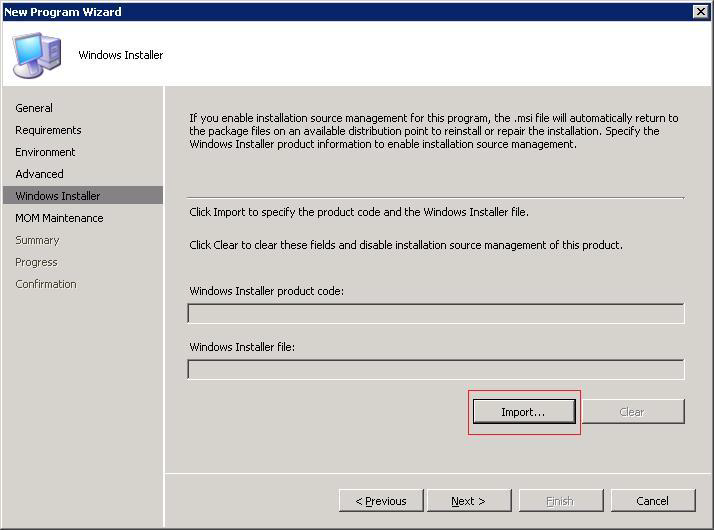
- On the Windows Installer page, select the FileSecure_Desktop_Client.msi under Windows Installer File by clicking on Import...
- You may leave the rest of the pages with default values and click Close.
3. Distribute the Package and the Program on Distribution Points
- In the Configuration Manager 2007 Administration Console, expand Computer Management in the left-hand side panel.
- Under Computer Management, expand Software Distribution.
- Expand Packages and select Seclore FileSecure Desktop Client.
- On the right-hand side panel, right click on Distribution Points. Select New Distribution Points.

- On the Copy Package page of New Distribution Points Wizard, select the distribution points where we want to copy the package to.
- Click Next. The message 'The New Distribution Points Wizard completed successfully' will be displayed. Close the window.

- In the panel on the right side, expand Seclore FileSecure Desktop Client under Packages.
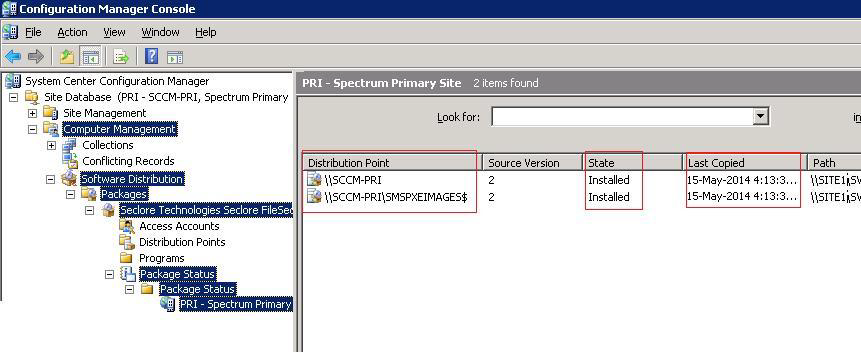
- Expand Package Status > Package Status
- Select the entry under Package Status. This will display the status of the package on the Distribution Point(s) on the right-hand side panel.
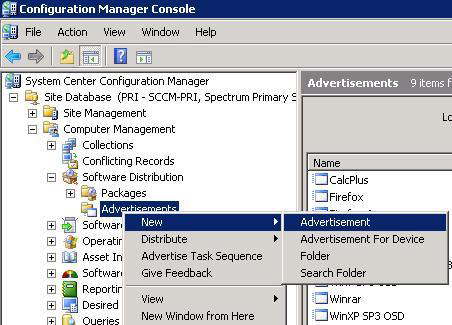
4. Create a new Advertisement
- In the Configuration Manager 2007 Administration Console, expand Computer Management in the panel in the left side.
- Under Computer Management, expand Software Distribution.
- Right click on Advertisements, click on New > Advertisement.
- Fill out the details on the General page of the New Advertisement Wizard. Select the Package. This would populate the programs available in this package in the Program field.
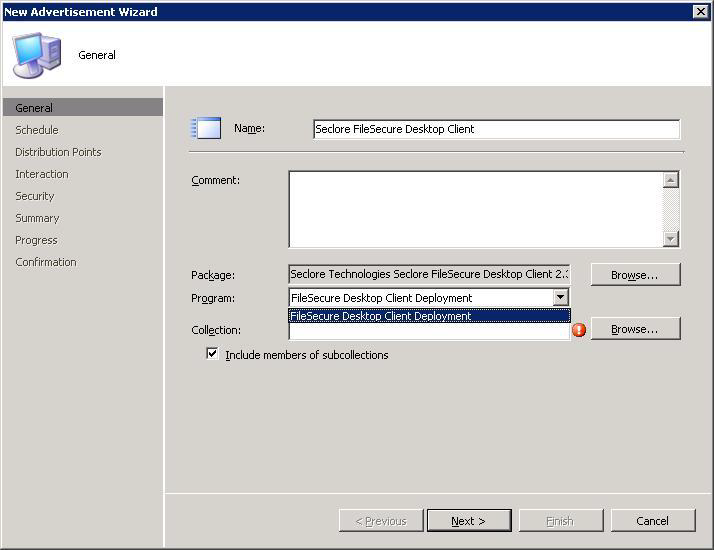
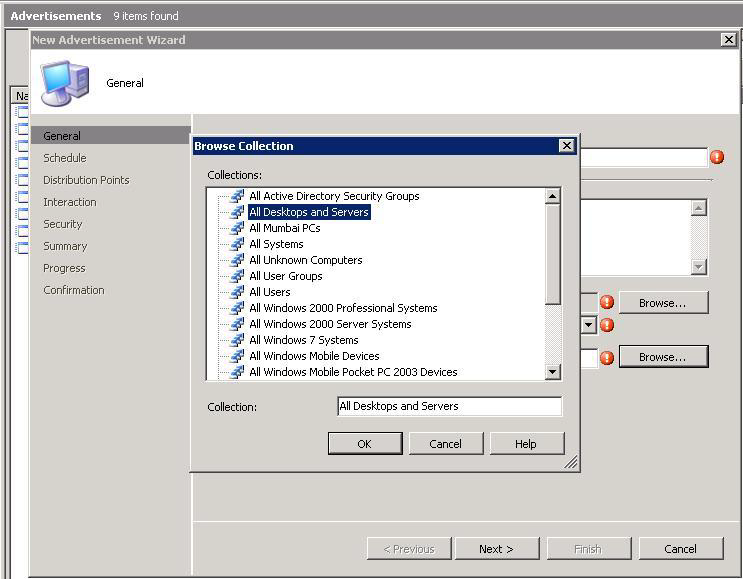
- Select the Collection where this advertisement needs to be advertised. (Note: You need to create multiple advertisements to advertise an advertisement to multiple collections)
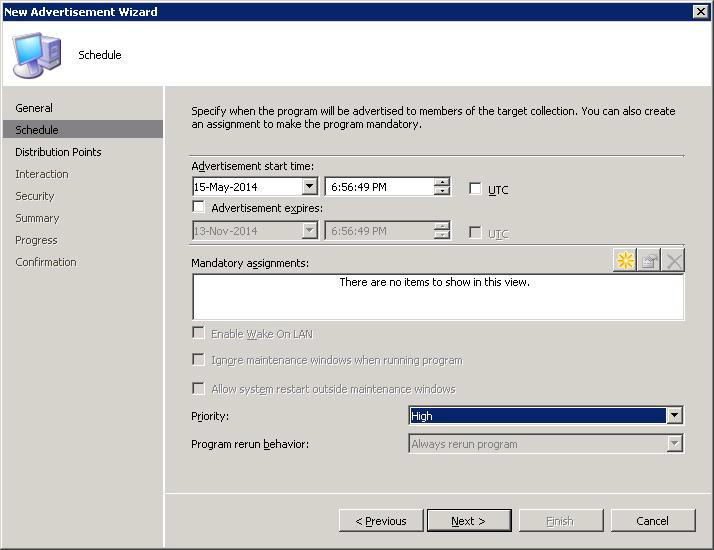
- On the New Advertisement Wizard’s Schedule page set the Advertisement start time (by default this takes the current time) and set the Priority to High. Optionally, you can make this advertisement a Mandatory assignment and select appropriate options.
- On the Distribution Points page, select the values as shown below:
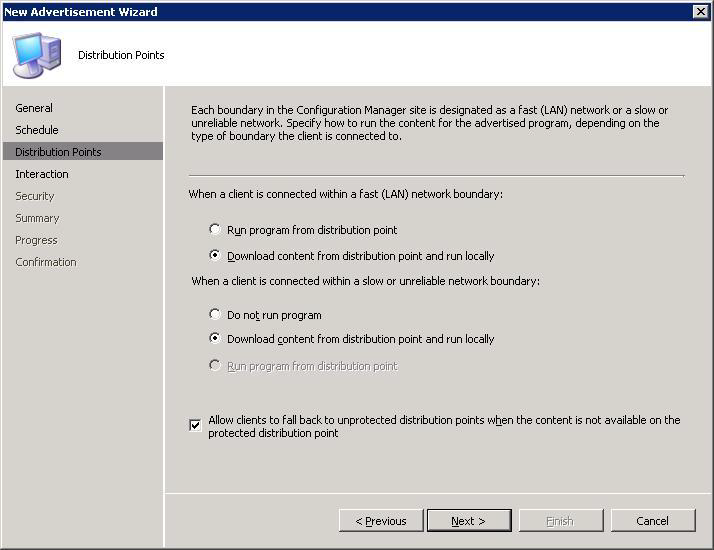
- You may leave the rest of the pages with default values and click Close.
After these steps, the client machines belonging to the selected collections will download the program from their respective distribution points locally and execute it.
Note: Admin permissions are needed for the installation of the agent. The installation would be done for all users on one machine each.